Dutch Oven Bread
-
If you have a dutch oven, you should definitely try this. I did and it's
amazing! If you don't have a dutch oven, you can use anything with a lid
that can ...
Saturday, March 16, 2013
Friday, February 15, 2013
Random Helpful Hints
Via: unplggd.com
Remove crayon masterpieces from your TV or computer screen with WD40 (also works on walls).
Disclaimer: I cannot vouch for the long term effects of using WD-40
on your computer screen. Use your own judgment and common sense, and, by all means, keep your toddler away from your computer! BUT, it does work,
Disclaimer: I cannot vouch for the long term effects of using WD-40
Thursday, February 14, 2013
Random Helpful Hints
Re-opening envelopes: If you seal an envelope and then realize you forgot to include something inside, just place your sealed envelope in the freezer for an hour or two. Voila! It unseals easily.
Use your hair conditioner to shave your legs. It's cheaper than shaving cream and leaves your legs really smooth. It's also a great way to use up the conditioner you bought but didn't like when you tried it in your hair.
Goodbye Fruit Flies: To get rid of pesky fruit flies, take a small glass, fill it 1/2' with Apple Cider Vinegar and 2 drops of dish washing liquid; mix well. You will find those flies drawn to the cup an d gone forever!
Get Rid of Ants: Put small piles of cornmeal where you see ants. They eat it, take it 'home,' can't digest it so it kills them. It may take a week or so, especially if it rains, but it works and you don't have the worry about pets or small children being harmed!
Wednesday, February 13, 2013
Random Helpful Hints
Via: stephmodo.com
For those who can’t stand the scrunching and bunching: how to perfectly fold a fitted sheet.
Tuesday, February 12, 2013
Random Helpful Hints
Via: realsimple.com
Pump up the volume by placing your iPhone / iPod in a bowl – the concave shape amplifies the music.
Monday, February 11, 2013
Random Helpful Hints
Via: flickr.com
Look up! Use wire to make a space to store gift wrap rolls against the ceiling, rather than cluttering up the floor.
Saturday, February 9, 2013
Random Helpful Hints
Via: realsimple.com
A tip for holiday packing. Store shoes inside shower caps to stop dirty soles rubbing on your clothes. And you can find them in just about every hotel!
Friday, February 8, 2013
Rainbow Sand
1 c sand or table salt
2 t powdered tempera paint
Plastic zip bag
1.
Pour sand or table salt and powdered tempera
paint into plastic zip bag and shake for 30 seconds or until the color is evenly
blended.
2.
Repeat the above step several times to create
different colors of Rainbow sand
3.
Store leftover sand in plastic zip bags or in an
airtight container
Tip: Draw a picture or outline a picture in a
coloring book using white school glue.
Sprinkle different colors of rainbow sand over the picture to create 3-D
paintings.
Check out more fun ideas from John and Danita Thomas, the Kid Concoctions Couple.
Thursday, February 7, 2013
Random Helpful Hints
Via: familyfun.go.com
A muffin pan becomes a craft caddy. Magnets hold the plastic cups down to make them tip-resistant.
Wednesday, February 6, 2013
Tuesday, February 5, 2013
Random Helpful Hints
Via: kiboomu.com
Bake cupcakes directly in ice-cream cones – so much more fun and easier for kids to eat. Definitely doing this!
Monday, February 4, 2013
Random Helpful Hints
Via: jengrantmorris.blogspot.com
Brilliant space-saver: install a tension rod to hang your spray bottles. Genius!
Sunday, February 3, 2013
Saturday, February 2, 2013
Random Helpful Hints
Via: wilton.com
Turn your muffin pan upside down, bake cookie-dough over the top and voila – you have cookie bowls for fruit or ice-cream. Click here for recipe.
Friday, February 1, 2013
Wednesday, January 30, 2013
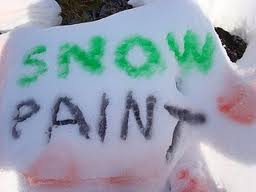
Snow Paint!
Here's an idea I got from my local MOPS group. I thought I'd share it
with all you moms with children old enough to enjoy something like this.
What you need:
1 cup water
10-12 drops food coloring
1 small spray bottle
Pour water into spray bottle. Add 10-12 drops of food coloring. Replace cap on bottle and shake well. Repeat the process to make a variety of colors. Kids can create art in the snow!
What you need:
1 cup water
10-12 drops food coloring
1 small spray bottle
Pour water into spray bottle. Add 10-12 drops of food coloring. Replace cap on bottle and shake well. Repeat the process to make a variety of colors. Kids can create art in the snow!
Tuesday, January 29, 2013
Hooded Towels
I love this idea! My sister-in-law had some of these and I had to share the idea with you! I found it HERE.all! This version uses a wash cloth, but clock HERE for another way to make them.
Here's how to make them:
1. You will need a regular sized bath towel, one wash cloth, matching thread, and a sewing machine.
2. Cut the tags out of the wash cloth. The wash cloth will be the hood of the final product.
3. Fold the wash cloth in half, inside out. Measure with your pointer finger on the folded edge. This is where you will start sewing.
4. Sew from that point, all the way to the corner, forming a triangle.
5. Fold the triangle away from the front of the hood and sew it down along the edges.
6. Do the same thing to the other side of the hood/wash cloth.
7. Turn the hood right side out.
8. Fold the towel in half.
9. The center is on top of the red and yellow pin located in the middle shown here. Fold about a pointer finger's distance to meet the inside, center of the towel. Pin the towel in place and do the same thing to the other side.
10. Lay the completed wash cloth/hood on top of the center where pins are located, making sure to center as well. The front of the hood should be on top as shown.
11. Sew all layers together, except for the front of the hood.
12. It's best to finish the inside with a needle and thread to keep all the layers from showing, plus it will give the hood and towel connection some extra strength for durability.
See how much prettier that is now!
Her son modeling the finished product.
Bed Bath and Beyond
So, I just learned some valuable information about Bed, Bath and Beyond. Did you know that those 20% off coupons can be used even after they're expired? The same with the $5 off a purchase of $15. Although it's unofficial, all the stores do it. ALL OF THEM. And, may of the sales people will hand you a coupon if you forgot yours, AND they will also tell you that if you forgot your coupon (and they don't have one for you) you can bring back your receipt and they will refund you the 20% from your purchase, usually with store credit.
And, the best of all: You know how I told you about getting seasonal Yankee Candles there for 25% off and using your buy-one-get-one free coupon? Well, add to that a 20% off coupon of $5 off coupon! Really! You could get 2 candles for as little as $13.75 (with the $5 off coupon, or $15 with the 20% off) . And they are originally $25 EACH! And, if you you don't like the scents they have on sale, bring them back later to exchange them for any scent you like! Or take them to your local Yankee Candle store. It's just that easy!
Monday, January 28, 2013
Restoring a Doll's Hair
She really is a sweet doll and Claire of course loves her! Claire loves her long hair and drags her around the house, pushes her down the slide, rolls around with her on the sofa and sleeps with her!
As darling as she is, her long hair can get into quite a big mess.
Like many dolls, she comes with some accessories to keep her looking in tip top shape!
A brush...
A mirror...
Neither of these things actually work when taming a mane like Rapunzel's.
After doing some internet research, we went to the beauty supply shop and got a wig brush. Why a wig brush? It has metal bristles with no little knobs on the ends. This is supposed to glide through the hair with ease and no cause static that a plastic brush would cause.
It costs about $3.
I also ran across several sites that suggested using fabric softener as a detangler. I didn't want to make Rapunzel's hair too greasy so I made a solution of about 2 TBSP of fabric softener and the rest water - this is a little travel spray bottle - it has now become Rapunzel's Magic Hair Spray.
Start slowly and spray lightly and it will start to look better. Here is a side by side shot of Rapunzel's hair. One side if done and the other isn't.
Look how great she looks - back to factory condition!
Sunday, January 27, 2013
What To Do With Your Christmas Cards
Christmas Card Saver
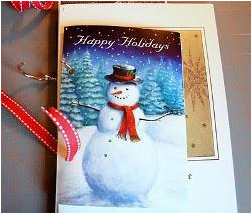
By: Ashley Connelly for The Creative Place Christmas cards make great keepsakes! This homemade book will trim your trash haul and serve as a fantastic reminder of the holiday season. Now you can relive your favorite Christmas memories all year long.
Materials:
Christmas cards
Update letters
Pictures
Envelopes
Glue or adhesive (I use Tombow rolling permanent adhesive)
Scissors or a rotary cutter
Ruler
Cutting mat
Hole punch
Two pieces of Christmas-themed ribbon (several inches each, depending on how many cards you have) or two 1.5" jump rings (you can get these at Wal-Mart or Staples - if you have a ton of cards that need to go into the book, you can make two or more books or purchase 2" jump rings at Staples)
Piece of 5"x7" chipboard to serve as a sturdy back cover, and materials to make a
front cover such as chipboard and embellishments (optional)
Instructions:
1.) Separate your cards into three piles:
- Pile 1: Cards that are one-sided and do not open (like photo cards or postcards)
- Pile 2: Cards that open and do NOT have writing or a picture on the inside left panel - we will be cutting these and covering up the inside left panel.
- Pile 3: Cards that open and DO have writing or a picture on the inside left panel - these are ones that you do NOT want to cut or cover up any part of the card. These will go into the book as they are.
2.) Take the cards in the second pile (that you do want to cut) and cut off the spine of each card, so as to separate them into two different pieces.
3.) Put glue (or rolling adhesive) on the back of each of the fronts of the cards. Glue this to the back of the card (once it is glued, you can see the writing and message on one side and the front of the card on the other side). So, you will have one single card piece now - below is the front and the back.
4.) Punch two holes in the left side of one of the cards - one hole about 2" from the top of the card, and one about 2" from the bottom of the card - both about 3/8" from the left side of the card.
5.) Use the card you just punched holes in as a guide to punching the holes in the rest of your cards. Since your cards are probably all different sizes, center the cards so that the holes are punched in the middle of each card.
6.) If you have a lot of update letters and/or pictures, punch holes in envelopes as well. You can then put the letters and pictures in there without having to punch holes in them.
7.) Now, begin putting the cards on the binder rings, or threading the ribbon through each hole. I did one of each in the picture as an example, but ended up using the ribbon because I liked how it looked so festive.
Finish binding.
8.) I made a cover for mine using a 5" x 5" piece of chipboard, a picture I had taken of our Christmas card display this Christmas and a tag where I wrote "Christmas Cards 2009". A cover is completely up to you, but it might be helpful to somewhere document what year the cards are from.
Find thousands of free projects, tips, tutorials and more at www.AllFreeChristmasCrafts.com
By: Ashley Connelly for The Creative Place Christmas cards make great keepsakes! This homemade book will trim your trash haul and serve as a fantastic reminder of the holiday season. Now you can relive your favorite Christmas memories all year long.
Materials:
Christmas cards
Update letters
Pictures
Envelopes
Glue or adhesive (I use Tombow rolling permanent adhesive)
Scissors or a rotary cutter
Ruler
Cutting mat
Hole punch
Two pieces of Christmas-themed ribbon (several inches each, depending on how many cards you have) or two 1.5" jump rings (you can get these at Wal-Mart or Staples - if you have a ton of cards that need to go into the book, you can make two or more books or purchase 2" jump rings at Staples)
Piece of 5"x7" chipboard to serve as a sturdy back cover, and materials to make a
front cover such as chipboard and embellishments (optional)
Instructions:
1.) Separate your cards into three piles:
- Pile 1: Cards that are one-sided and do not open (like photo cards or postcards)
- Pile 2: Cards that open and do NOT have writing or a picture on the inside left panel - we will be cutting these and covering up the inside left panel.
- Pile 3: Cards that open and DO have writing or a picture on the inside left panel - these are ones that you do NOT want to cut or cover up any part of the card. These will go into the book as they are.
2.) Take the cards in the second pile (that you do want to cut) and cut off the spine of each card, so as to separate them into two different pieces.
3.) Put glue (or rolling adhesive) on the back of each of the fronts of the cards. Glue this to the back of the card (once it is glued, you can see the writing and message on one side and the front of the card on the other side). So, you will have one single card piece now - below is the front and the back.
4.) Punch two holes in the left side of one of the cards - one hole about 2" from the top of the card, and one about 2" from the bottom of the card - both about 3/8" from the left side of the card.
5.) Use the card you just punched holes in as a guide to punching the holes in the rest of your cards. Since your cards are probably all different sizes, center the cards so that the holes are punched in the middle of each card.
6.) If you have a lot of update letters and/or pictures, punch holes in envelopes as well. You can then put the letters and pictures in there without having to punch holes in them.
7.) Now, begin putting the cards on the binder rings, or threading the ribbon through each hole. I did one of each in the picture as an example, but ended up using the ribbon because I liked how it looked so festive.
Finish binding.
8.) I made a cover for mine using a 5" x 5" piece of chipboard, a picture I had taken of our Christmas card display this Christmas and a tag where I wrote "Christmas Cards 2009". A cover is completely up to you, but it might be helpful to somewhere document what year the cards are from.
Find thousands of free projects, tips, tutorials and more at www.AllFreeChristmasCrafts.com
Subscribe to:
Posts (Atom)