Showing posts with label Kids. Show all posts

Friday, May 17, 2013

TREASURE STONES

TREASURE STONES
(A Kid Concoctions Original)
 "For his 6th birthday, our son Kellen wanted a pirate-themed party where we would give out mystery rocks, store-bought stones with tiny treasures inside, as favors," says Danita Thomas. "Rather than buying them for the 15 guests, John suggested trying to make them. He remembered his mother making stonelike clay with used coffee grounds when he was a kid. So after some experimenting, we came up with our own surprise-filled mystery rocks that turn trash into treasure."


Materials
1 cup flour
1 cup used coffee grounds (set them out overnight to dry)
1/2 cup salt
1/4 cup sand
3/4 cup water
Small prizes, such as plastic toys, dice, and marbles

Instructions
Heat the oven to 170 degrees. In a medium-size bowl, combine the dry ingredients. Slowly add the water, stirring until the mixture forms a dough.

Roll a piece of the dough into a ball roughly the size of a baseball. Use your finger to bore a hole to the center, push in a couple of small prizes, then seal the hole with more dough. Repeat this process with the rest of the dough.

Place the stones on a baking sheet and cook them for 40 minutes, then allow them to cool completely before giving them to the kids to break open (easy to do by hand). Makes 4 treasure-filled stones.

Tuesday, May 14, 2013

Kool-Aid Play Dough


Ingredients:

2 1/2 cups flour 
1/2 cup salt
2 (4 g) packages unsweetened Kool-Aid powdered drink mix
2 cups boiling water
3 tablespoons oil

Directions:


  1.  Mix flour, salt, Kool-Aid until blended.
  2.  Add oil to boiling water, mix with spoon until cool enough to knead.
  3.  Continue kneading until color is blended.
  4.  Store in air tight bag or container in the refrigerator.

Monday, May 13, 2013

Play Dough

What You Will Need:
  • 1 cup Flour
  • 1 cup Water
  • 1 or 2 drops Food Coloring
  • 1/2 cup Salt
  • 1 tablespoon Salt
  • 1 tablespoon Oil
  • 2 teaspoons Cream of Tartar
  • Measuring Cups and Spoons
  • Saucepan
  • Wooden Spoon
  • Floured Board
  • Resealable Plastic Bag (or other air-tight container)


What You Do:
  • Mix all ingredients together in a saucepan.
  • Have an adult help you heat the mixture on medium heat until it just starts to cook. Make sure to stir the mixture while it is heating. When it is done, the mixture should form a ball and look like sticky play dough.
  • Take the play dough from the pan and put it onto a floured board. Let it sit until it is cool to the touch.
  • Knead the dough by pushing it down and away from you and folding it over, until you have a smooth dough.
  • Mold the play dough into whatever interesting shapes you can think of!
  • When you are done playing, store your play dough in a resealable plastic bag, making sure to get as much air out of the bag as possible.


Variations:
  • We like to keep our play dough in the refrigerator, where it will last for weeks!
  • Add a very small amount of vanilla, cinnamon, or other scent to make your dough have a wonderful smell.
  • We like to use liquid watercolor paints to color our dough — much more vibrant colors!

Wednesday, January 30, 2013

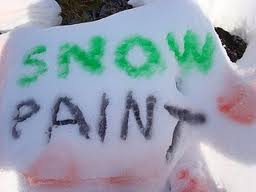
Snow Paint!

Here's an idea I got from my local MOPS group. I thought I'd share it with all you moms with children old enough to enjoy something like this.

What you need:
1 cup water
10-12 drops food coloring
1 small spray bottle

Pour water into spray bottle.  Add 10-12 drops of food coloring.  Replace cap on bottle and shake well.  Repeat the process to make a variety of colors.  Kids can create art in the snow!

Tuesday, May 22, 2012

Make Your Own Corn Dogs!

1/2 c corn meal
1/2 c flour
2 t baking powder
1/8 c sugar
1/2 t salt

1/2 c milk
1 egg, beaten
12 hot dogs

1/3 c flour for coating dogs (optional, try if your batter doesn't stick to the hot dog)

Oil for Frying

Combine dry ingredients.  Beat together milk and egg and add to dry ingredients.  Mix together. Pour batter in a tall 2 cup glass.  Make sure hot dogs are dry using paper towel and place hot dogs on pop-cycle sticks or something similar.  Roll hot dogs in flour and tap away excess flour.  Dip hot dogs into batter, using a twirling motion and coating each hot dog well.  Allow excess to drip away. Immediately place in hot oil.  (about 350 degrees)  Fry until golden brown.  Allow to cool slightly before eating.

Friday, March 30, 2012

Homemade SUPER Bubbles

Save money by making your own bubbles!
2 c Joy dish soap
6 c tap water
3/4 c karo white syrup

Mix all ingredients together and if possible, let sit over night.

Sunday, January 22, 2012

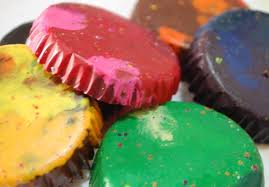
Recycled Crayons

 Recycled Crayons
In a muffin pan, place cup cake liners in each space.  Fill each one 2/3 full with crayon stubs (without paper).  You can fill each paper with similar colors or random!  Bake in the over at 275 for 10 minutes, or until crayons are melted.  Remove and let an cool to room temperature.  Put pan in freezer to harden the crayons faster.  Remove from the pan and paper.  You will have new crayons in a fun new shape!
If you want crayons with a smooth edge, you can do it without the muffin papers.  

Friday, October 7, 2011

Marble Maze


Make one of these cardboard towers (just follow the steps below), and your kids will be set for a rolling good time. The object is to see whose marble rolls the farthest once it exits the maze.
Materials
  • 7 long wrapping paper or mailing tube
  • 2 empty plastic margarine tubs
  • Box of uncooked rice
  • Pencil
  • Ruler
  • Scissors
  • Extra-large rubber bands
Instructions
  1. Construct Tower Posts: Start with the left one. Set a long wrapping paper or mailing tube on end. Draw a pencil line from top to bottom, then mark five points along it 2, 8, 10, 19, and 21 inches from the top. With a craft knife (adults only), cut a hole around each mark that's just big enough to accommodate the end of another tube. For the right post, position the holes 4, 6, 13, 15, and 25 inches from the top, then cut one more hole (where the marble will exit the maze) in the opposite side of the tube 25 3/4 inches from the top.
  2. Anchor the Posts: Make a base for each post by cutting a hole in the bottom of a small empty plastic margarine tub. Put the lid on the tub, then set the tub upside down on the floor and pour uncooked rice into the hole, filling the tub. Fit the bottom of the post into the hole in the tub.
  3. Marble Maze - Step 3  
    Make Tunnels: Next, transform four more tubes into crossings. Holding each one horizontally, cut a U-shaped opening in the upper wall at one end and in the lower wall at the opposite end, as shown. For the tower's lowest tunnel, cut a U-shaped opening in one end only of a fifth tube. Then cut peepholes in the tops of each tube.
  4. Assemble the Tower: Starting at the top of the tower, fit the tunnel ends into the post holes, as shown in the photo above, so that the ends with openings in the upper wall are raised and the uncut end of the fifth tunnel extends to the exit hole. Finally, if your tower is a bit wobbly, you can stretch extra-large rubber bands or loop string around the posts for stability.

Wednesday, October 5, 2011

Grass Head Guys


Check out more fun ideas from John and Danita Thomas, the Kid Concoctions Couple.

Materials
  • 2 tablespoons grass seed
  • Nylon stocking foot
  • 1 cup potting soil
  • Plastic yogurt container
  • Water
  • 2 googly eyes
  • Permanent marker
  • Double-sided tape
  • Card stock, craft foam, and so on, for clothing
Instructions
  1. Spoon the grass seed into the stocking foot, and the potting soil on top of the seed. Tie a knot in the stocking, leaving the excess fabric hanging. Fill a yogurt container halfway with water and place the stocking head on top with the nylon tail in the water to serve as a wick. Attach googly eyes to the head and draw on a mouth with permanent marker. To decorate the yogurt container, tape on clothing made from card stock or other materials.
Tips:
Be sure to check the water level in the yogurt container every day, keeping it at least half full.

Wednesday, September 7, 2011

A Picnic Twist on Twister

Here's a great way to play twister outside...with a lot of people or just a few!

Materials:  
  • Cardboard (middle for circle spinner, the circle-frame to be used as a stencil for spray painting)
  • Upholstery tack (you may find a better solution, we were using what we had on hand - without buying more materials)
  • 3 colors of Krylon spray paint
  • Gorilla tape
Tools:
  • Utility knife
  • Dinner plate to trace
  • Markers
  • Ruler/yardstick
How To:

1.  For instructions on making your own spinner, go HERE.  Or, you can use one from a game you bought or just put all the different combinations into a hat/bag and draw them out.  It's a lot easier than making your own spinner.

2.  Decide on a flat large area of the yard. Place the stencil in the upper left hand corner and choose your first color. We chose red.

3.  Measure to the right of first circle 6 inches to place the circle stencil (the left inside circle border placed at 6" as shown).  Spray paint another color. Repeat for desired size.  (Or decide on a pattern as shown in the Pinterest inspiration.)

4.  Start the next row with the 2nd color used in row one, ending with first color used in row one. Repeat. 

5.  Let dry.

Time to play!

Friday, August 19, 2011

$uzie's Savings Shed

 
This weekend is the $hed's $econd Birthday! LOTS of great 50% OFF $avings on the remaining Spring and summer merchandise. Perfect for stocking up for next year! Bring in your coupon and save another 25%! This is the last chance weekend for theses deals. She will be closed the next two weeks to change seasons! Come out today and tomorrow 8-5 to $ave $ave $ave!!
($uzie's Savings Shed is a quality children's clothes consignment store in a relaxed, charming, country setting. Go see for yourself...and shop for your kids!)
 

Thursday, August 11, 2011

Hy-Vee Kids Club

Did you know that Hy-Vee has a Kid's Club? I just found out about it this week.  Apparently, any child, infant to age 12, is eligible to sign up for the Kid's Club. There are great benefits involved too! From my understanding you go to customer service and sign your child up. They will be given a name tag that they can wear in the store. When they wear this name tag they can:
  • Get a FREE gogurt tube in the dairy department
  • Get a FREE cookie from the bakery
  • Get a FREE sucker from the pharmacy
  • Get a FREE fruit snack from customer service
  • Get a FREE beef or cheese stick from the meat counter
  • Get a FREE seasonal fruit from the produce department
I believe they even get something sent to them for their birthday.  Also, with the purchase of an adult meal, kids will eat free at the deli.  Your children will also be put on a mailing list and be alerted by Hy-Vee when they have fun FREE events going on!!!

Each store may vary, so don't hold me to what I listed above.  :-)  But I better go get Josh signed up for this before his birthday next week!

Wednesday, August 10, 2011

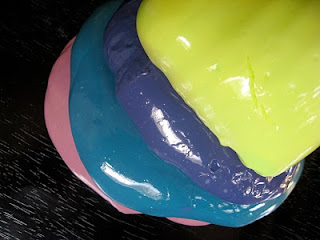
Homemade Goo


Tools and Materials
2 mixing bowls
Warm water
Elmer's glue
1/4 teaspoon unsweetened Kool-Aid or 4 to 8 drops liquid food coloring
Craft stick
Borax
Slime How-To
1. Mix together 1/3 cup warm water, 1/2 cup Elmer's glue, and Kool-Aid or food coloring. Stir thoroughly with craft stick; set aside.
2. Mix together 3/4 cup warm water and 2 teaspoons Borax. Stir thoroughly with craft stick; pour into mixture one, stirring continuously.
3. Remove glob from bowl and work in your hands for 2 to 3 minutes. Store in resealable plastic bag or air-tight container.Tip: If mixture starts to dry out, pour a small amount of water over it and knead for 2 to 3 minutes before returning to a tightly sealed container.
Professor Figgy was the guest on Martha who showed this technique.  He sells slime making kits on his site.  Wouldn't these make a great gift?  I personally will be making my own!

Watch it being made on Martha Stewart.