Monday, January 28, 2013

Restoring a Doll's Hair


She really is a sweet doll and Claire of course loves her!  Claire loves her long hair and drags her around the house, pushes her down the slide, rolls around with her on the sofa and sleeps with her!

As darling as she is, her long hair can get into quite a big mess.  

Like many dolls, she comes with some accessories to keep her looking in tip top shape! 
A brush...

A mirror...

Neither of these things actually work when taming a mane like Rapunzel's.  

After doing some internet research, we went to the beauty supply shop and got a wig brush.  Why a wig brush?  It has metal bristles with no little knobs on the ends.  This is supposed to glide through the hair with ease and no cause static that a plastic brush would cause.  

It costs about $3. 

I also ran across several sites that suggested using fabric softener as a detangler.  I didn't want to make Rapunzel's hair too greasy so I made a solution of about 2 TBSP of fabric softener and the rest water - this is a little travel spray bottle - it has now become Rapunzel's Magic Hair Spray.

Start slowly and spray lightly and it will start to look better.  Here is a side by side shot of Rapunzel's hair.  One side if done and the other isn't. 

Look how great she looks - back to factory condition! 

Sunday, January 27, 2013

What To Do With Your Christmas Cards

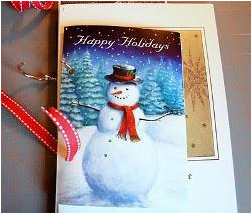
Christmas Card Saver
By: Ashley Connelly for The Creative Place Christmas cards make great keepsakes! This homemade book will trim your trash haul and serve as a fantastic reminder of the holiday season. Now you can relive your favorite Christmas memories all year long.
Materials:
 Christmas cards
 Update letters
 Pictures
 Envelopes
 Glue or adhesive (I use Tombow rolling permanent adhesive)
 Scissors or a rotary cutter
 Ruler
 Cutting mat
 Hole punch
 Two pieces of Christmas-themed ribbon (several inches each, depending on how many cards you have) or two 1.5" jump rings (you can get these at Wal-Mart or Staples - if you have a ton of cards that need to go into the book, you can make two or more books or purchase 2" jump rings at Staples)
 Piece of 5"x7" chipboard to serve as a sturdy back cover, and materials to make a
front cover such as chipboard and embellishments (optional)
Instructions:
1.) Separate your cards into three piles:
- Pile 1: Cards that are one-sided and do not open (like photo cards or postcards)
- Pile 2: Cards that open and do NOT have writing or a picture on the inside left panel - we will be cutting these and covering up the inside left panel.
- Pile 3: Cards that open and DO have writing or a picture on the inside left panel - these are ones that you do NOT want to cut or cover up any part of the card. These will go into the book as they are.

2.) Take the cards in the second pile (that you do want to cut) and cut off the spine of each card, so as to separate them into two different pieces.
3.) Put glue (or rolling adhesive) on the back of each of the fronts of the cards. Glue this to the back of the card (once it is glued, you can see the writing and message on one side and the front of the card on the other side). So, you will have one single card piece now - below is the front and the back.
4.) Punch two holes in the left side of one of the cards - one hole about 2" from the top of the card, and one about 2" from the bottom of the card - both about 3/8" from the left side of the card.

5.) Use the card you just punched holes in as a guide to punching the holes in the rest of your cards. Since your cards are probably all different sizes, center the cards so that the holes are punched in the middle of each card.
6.) If you have a lot of update letters and/or pictures, punch holes in envelopes as well. You can then put the letters and pictures in there without having to punch holes in them.

7.) Now, begin putting the cards on the binder rings, or threading the ribbon through each hole. I did one of each in the picture as an example, but ended up using the ribbon because I liked how it looked so festive.
Finish binding.
8.) I made a cover for mine using a 5" x 5" piece of chipboard, a picture I had taken of our Christmas card display this Christmas and a tag where I wrote "Christmas Cards 2009". A cover is completely up to you, but it might be helpful to somewhere document what year the cards are from.

Find thousands of free projects, tips, tutorials and more at www.AllFreeChristmasCrafts.com

Saturday, January 26, 2013

Tropical Rain Stick


Heavy cardboard mailing tube
2 plastic caps or duct tape to seal the tube
Nails hammer
Seeds, small pebbles, rice, or dried beans
Adhesive-backed shelf paper, wrapping paper, or ribbon to decorate.

1.       Hammer nails into the mailing tube 1/8 inch apart, using the spiral seam of the cardboard tube as a guide.
2.       Seal one end of the tube with plastic cap or duct tape.  Add several handfuls of assorted fuller material (rice, seeds, beans, etc.)
3.       Seal other end of the tube securely with plastic caps or duct tape.
4.       Decorate your tropical rain stick with ribbon, adhesive backed shelf paper or wrapping paper.

Friday, January 25, 2013

Make Your Own Face Paint (Great for costumes)


Face and Body Paint
2 T solid shortening
1 T cornstarch
4-5 drops of food coloring
Small make-up sponge

1.       Mix shortening and cornstarch together in a small bowl until smooth.
2.       Add 4-6 drops of food coloring .Mix until the color is evenly blended.
3.       Apply face and body paint to arms, legs, and face, using a small make-up sponge
4.       Remove paint with soap and water.

Thursday, January 24, 2013

Make Your Own Taco Seasoning

We go through a lot of taco seasoning in our house.  I've found an easy way to make it when you don't have it on hand, or if you want to save some money!


1 T onion powder
1 t salt
1 T chili powder
1/8 t cayanne pepper (I usually leave this out)
1 t oregano
1 T garlic
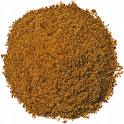
1 T cumin

You can add more or less of each ingredient to your own taste.  Enjoy!

Ice-Proof Your Car Windows


Ice-proof your windows...with vinegar! Frost on it's way? Just fill a spray bottle with three parts vinegar to one part water & spritz it on all your windows at night. In the morning, they'll be clear of icy mess!--nice to know.

Wednesday, January 23, 2013

Free Game from Redbox and Gifts to Grow Points


redbox-logo
If you’ve got a gamer in the house, text GAMEKIDS to 727272 in order to receive a free Redbox video game rental code. The code is good through January 31. Now I just need to find a code good for one free kid rental so I can have them use my free code for me.

Free Pampers Gifts to Grow Points
Code FB1MLK21AP6PD13 expires on Jan. 25 and is worth 10 free Pampers Gifts to Grow points. If you’re just now signing up, check out the HIF archives for older codes that might help bump your overall total. But if you’re already a member, here’s the direct login link.

Kitchen Tip

Kitchen Tips-Saving Money and Time

After cutting up celery sticks to have in the fridge, I always end up throwing so much away!  Look at all this that goes to waste!
 But my mother-in-law has taught me not to throw things like that away.  Use them!  So I chop them up into tiny pieces and freeze them!
And when I go to make soup (or stuffing), I just throw it in!  It makes making soup easy and quick!

Friday, November 30, 2012

Make Your Own Ornament Tree

Ornament Christmas Tree for a Table or Mantel
Article found HERE

How to make a knitting needle Tabletop Christmas Tree
Experiment with different style balls and your favorite colors.   Use all one color or try a different color for each size ball you add to the knitting needle or try four balls of varying sizes in each color. This will give you a spiral effect.

How to Make the Knitting Needle Ornament Tree

Supplies Needed:

A mix of round Christmas ornaments in 4 different sizes –for one tree you will need about 20 balls.  At least 4 of each size.
Knitting Needle – 14 inches long (tall tree)  Spray paint the needles if needed to match your ornaments.
Optional: Christmas tree peak topper or a star ornament, ribbon spool, spray paint, scrapbook paper, glue, spray paint, paper cutter
Supplies-Needed to make an ornament Christmas Tree
To make the ribbon spool tree stand: Spray the spool with spray paint to coordinate with your ornaments.  Cut scrapbook paper the width of the spool. You could use ribbon, but I like the more finished look of the paper on the spool.
Decorating for Christmas

Attach the paper with glue. I used Aleene’s Tacky Line Roll Adhesive.
Holiday decorating ideas for Christmas
Attach to the spool.
Ribbon-and-Scrap-paper-stri
Thread the knitting needle up through the bottom of the spool.
Needles-in-Spools

If the spool has a large hole – you can stuff it with pieces of STYROFOAM to make sure the needle stays straight.
Spools-and-Needles

String four large Christmas ball ornaments (about 4” diameter) onto the needle, slipping the metal loops on the balls over the point of the needle. These four balls will form the base of the tree.  If you do not want to use the spool tree stand  and want to make the basic tree – the four balls when placed  squarely on a table will hold the needle upright.
Tabletop Knitting Needle Ornament Tree instructions and tutorial

Next string onto the needle four balls of a slightly smaller size. Each one will fit between two of the larger ones.  Then string on another four, slightly smaller, and finally four more again, slightly smaller, so that your tree has sixteen Christmas ball ornaments in all.  You can add more or less depending on the size of your balls.
How to make a ornament tree using a knitting needle
The tip will look like this.
Ideas for Chistmas decorating

On top of the needle place a Christmas star ornament.  I found this one at Michaels.  It had a “spring” style attachment that I removed.  I used that existing hole to place the star on the top of the knitting needle.  I used an awl to make the hole a bit larger so it fit over the tip of the needle.
Decorating for Christmas

Another way to display the tree is to place the whole thing in or on top of a planter.
How to make a tabletop Ornament Tree using a knitting needle

Thursday, November 29, 2012

Candy Serving Tray


Mint Serving Tray
You’ll need:mints
a cookie sheet
parchment or wax paper {I used wax paper, but heard parchment paper works better!}
your oven
How To:1. Heat oven to 350 degrees
2. Place wax paper on cookie sheet
3. Arrange mints in any design you wish on top of wax paper or parchment paper on a cookie sheet {allowing extra room on the sides}
4. Bake for approximately 8-10 minutes
5. Take out and allow to cool on cookie sheet {cools in approximately 5 minutes}
6. Remove wax paper from bottom {be careful, tray is fragile and breaks easily}
Voila!  A beautiful serving tray!
{Don’t forget your wax paper underneath the mints!
… lesson learned on this tray because it never made it off the cookie sheet in one piece!}
My favorite… with Hershey’s Candy Cane Kisses.
Yum!